by playing video games.
OpenCV Object Detection in Games
Fast Window Capture
Learn how to capture window data in real-time as a video stream for processing with OpenCV. We try several different methods searching for the fastest way possible. In this tutorial I also discuss the importance of good Google search skills as a programmer, and we revisit some basic object-oriented programming concepts.
Links
Grab the code on GitHub: https://github.com/learncodebygaming/opencv_tutorials
Fastest way to take a screenshot with Python on Windows: https://stackoverflow.com/a/3586280/1893164
Convert PyAutoGUI image to OpenCV: https://stackoverflow.com/q/32918978/4655368
Convert SaveBitmapFile to an OpenCV image instead: https://stackoverflow.com/q/41785831/4655368
Best Numpy reference: https://numpy.org/doc/1.18/user/quickstart.html
List all your windows: https://stackoverflow.com/q/55547940/4655368
Up to this point, we've been using OpenCV to detect objects in static images. Now we're ready to apply those same techniques to video games in real time.
Remember that video is just a series of still images shown in rapid succession. In this tutorial our goal is to capture screenshots as fast as possible and display them in an OpenCV window, so that we get a real time video stream of the game we're interested in. This will set us up to begin processing image data with OpenCV in real-time.
OpenCV has a tutorial on "Getting Started with Videos" that will serve as the basis for our code. Our starting point differs from the official tutorial only in that we are preparing to work with screenshot data instead of frames from a camera.
while(True):

    screenshot = get_screeshot()

    cv.imshow('Computer Vision', screenshot)

    # press 'q' with the output window focused to exit.
    # waits 1 ms every loop to process key presses
    if cv.waitKey(1) == ord('q'):
        cv.destroyAllWindows()
        break
When defining get_screenshot() you could simply use pyautogui.screenshot() from the PyAutoGUI library, or ImageGrab.grab() from the Python Image Library.
screenshot = pyautogui.screenshot()
    # or: screenshot = ImageGrab.grab()
    screenshot = np.array(screenshot)
    screenshot = cv.cvtColor(screenshot, cv.COLOR_RGB2BGR)
And this would work, but there are several benefits to calling the Windows API directly instead. Firstly, we approach the theoretical limit for how fast we can take these screenshots by dealing right with the operating system itself. Secondly, the Windows API has methods that will allow us to grab the screen data for only the window we're interested in, even when it's minimized or off screen.
To do this, we must first pip install pywin32 to get access to the Win32 API in Python.
Let's start with some code to capture a single screenshot of our entire desktop and save that to a file. This will confirm for us that the Windows API calls are working.
import win32gui, win32ui, win32con

def test_get_screenshot():
    # define your monitor width and height
    w, h = 1920, 1080

    # for now we will set hwnd to None to capture the primary monitor
    #hwnd = win32gui.FindWindow(None, window_name)
    hwnd = None

    # get the window image data
    wDC = win32gui.GetWindowDC(hwnd)
    dcObj = win32ui.CreateDCFromHandle(wDC)
    cDC = dcObj.CreateCompatibleDC()
    dataBitMap = win32ui.CreateBitmap()
    dataBitMap.CreateCompatibleBitmap(dcObj, w, h)
    cDC.SelectObject(dataBitMap)
    cDC.BitBlt((0, 0), (w, h), dcObj, (0, 0), win32con.SRCCOPY)

    # save the image as a bitmap file
    dataBitMap.SaveBitmapFile(cDC, 'debug.bmp')

    # free resources
    dcObj.DeleteDC()
    cDC.DeleteDC()
    win32gui.ReleaseDC(hwnd, wDC)
    win32gui.DeleteObject(dataBitMap.GetHandle())
By calling this function, you should end up with a debug.bmp screenshot file.
The next step is to modify this function so that instead of saving an image file, it instead returns the image data, formatted to work with OpenCV.
def get_screenshot():
    # define your monitor width and height
    w, h = 1920, 1080

    # for now we will set hwnd to None to capture the primary monitor
    #hwnd = win32gui.FindWindow(None, window_name)
    hwnd = None

    # get the window image data
    wDC = win32gui.GetWindowDC(hwnd)
    dcObj = win32ui.CreateDCFromHandle(wDC)
    cDC = dcObj.CreateCompatibleDC()
    dataBitMap = win32ui.CreateBitmap()
    dataBitMap.CreateCompatibleBitmap(dcObj, w, h)
    cDC.SelectObject(dataBitMap)
    cDC.BitBlt((0, 0), (w, h), dcObj, (0, 0), win32con.SRCCOPY)

    # convert the raw data into a format opencv can read
    signedIntsArray = dataBitMap.GetBitmapBits(True)
    img = np.fromstring(signedIntsArray, dtype='uint8')
    img.shape = (h, w, 4)

    # free resources
    dcObj.DeleteDC()
    cDC.DeleteDC()
    win32gui.ReleaseDC(hwnd, wDC)
    win32gui.DeleteObject(dataBitMap.GetHandle())

    # drop the alpha channel to work with cv.matchTemplate()
    img = img[...,:3]

    # make image C_CONTIGUOUS to avoid errors with cv.rectangle()
    img = np.ascontiguousarray(img)

    return img
Now we can call this function from our original infinite loop and get a real-time stream of our desktop.
To improve upon this, we can use win32gui.FindWindow(None, window_name) to capture just the window we're interested in. Replace the window_name with a string that contains the name found in the title bar of the window you want to capture. Doing so will allow you to capture the frames from that window even when it's hidden behind other windows.
If you're having trouble figuring out the name of the window you want, you can use this code to list the names of all your existing windows:
def list_window_names():
    def winEnumHandler(hwnd, ctx):
        if win32gui.IsWindowVisible(hwnd):
            print(hex(hwnd), win32gui.GetWindowText(hwnd))
    win32gui.EnumWindows(winEnumHandler, None)
We can improve our code further by trimming off the excess around the window we're interested in. When you run the above code, you will notice black space to the right and below the window image, as well as the window borders and title bar. Removing these will not only clean things up, it will also improve our frame rate. We can also get improvements by not calling win32gui.FindWindow() on every call to get_screenshot(), so let's turn this into a class.
class WindowCapture:

    # properties
    w = 0
    h = 0
    hwnd = None
    cropped_x = 0
    cropped_y = 0
    offset_x = 0
    offset_y = 0

    # constructor
    def __init__(self, window_name):
        # find the handle for the window we want to capture
        self.hwnd = win32gui.FindWindow(None, window_name)
        if not self.hwnd:
            raise Exception('Window not found: {}'.format(window_name))

        # get the window size
        window_rect = win32gui.GetWindowRect(self.hwnd)
        self.w = window_rect[2] - window_rect[0]
        self.h = window_rect[3] - window_rect[1]

        # account for the window border and titlebar and cut them off
        border_pixels = 8
        titlebar_pixels = 30
        self.w = self.w - (border_pixels * 2)
        self.h = self.h - titlebar_pixels - border_pixels
        self.cropped_x = border_pixels
        self.cropped_y = titlebar_pixels

        # set the cropped coordinates offset so we can translate screenshot
        # images into actual screen positions
        self.offset_x = window_rect[0] + self.cropped_x
        self.offset_y = window_rect[1] + self.cropped_y

    def get_screenshot(self):

        # get the window image data
        wDC = win32gui.GetWindowDC(self.hwnd)
        dcObj = win32ui.CreateDCFromHandle(wDC)
        cDC = dcObj.CreateCompatibleDC()
        dataBitMap = win32ui.CreateBitmap()
        dataBitMap.CreateCompatibleBitmap(dcObj, self.w, self.h)
        cDC.SelectObject(dataBitMap)
        cDC.BitBlt((0, 0), (self.w, self.h), dcObj, (self.cropped_x, self.cropped_y), win32con.SRCCOPY)

        # convert the raw data into a format opencv can read
        #dataBitMap.SaveBitmapFile(cDC, 'debug.bmp')
        signedIntsArray = dataBitMap.GetBitmapBits(True)
        img = np.fromstring(signedIntsArray, dtype='uint8')
        img.shape = (self.h, self.w, 4)

        # free resources
        dcObj.DeleteDC()
        cDC.DeleteDC()
        win32gui.ReleaseDC(self.hwnd, wDC)
        win32gui.DeleteObject(dataBitMap.GetHandle())

        # drop the alpha channel, or cv.matchTemplate() will throw an error like:
        #   error: (-215:Assertion failed) (depth == CV_8U || depth == CV_32F) && type == _templ.type()
        #   && _img.dims() <= 2 in function 'cv::matchTemplate'
        img = img[...,:3]

        # make image C_CONTIGUOUS to avoid errors that look like:
        #   File ... in draw_rectangles
        #   TypeError: an integer is required (got type tuple)
        # see the discussion here:
        # https://github.com/opencv/opencv/issues/14866#issuecomment-580207109
        img = np.ascontiguousarray(img)

        return img
To use this class, and to measure our frames per second, our main loop will now look like this:
wincap = WindowCapture('Albion Online Client')
loop_time = time()
while(True):

    # get an updated image of the game
    screenshot = wincap.get_screenshot()

    cv.imshow('Computer Vision', screenshot)

    # debug the loop rate
    print('FPS {}'.format(1 / (time() - loop_time)))
    loop_time = time()

    # press 'q' with the output window focused to exit.
    # waits 1 ms every loop to process key presses
    if cv.waitKey(1) == ord('q'):
        cv.destroyAllWindows()
        break
Finally, we'll need a way to convert positions we detect in our screenshots back to pixel positions on our actual monitor. In the WindowCapture class constructor, I've already included code to calculate the window offset using the window position data from win32gui.GetWindowRect(). Let's add a method to our class that uses this offset to return that converted screen position.
def get_screen_position(self, pos):
    return (pos[0] + self.offset_x, pos[1] + self.offset_y)
Now that we're capturing the screen data, we're all set to start processing these images with OpenCV. Our next step is simply to combine the Window Capture we did here with the Match Template code we wrote previously in this series. If you're following along, now would be a good time to experiment with doing that next step yourself. When you've finished, you can compare the solution you came up with to mine in the next tutorial.
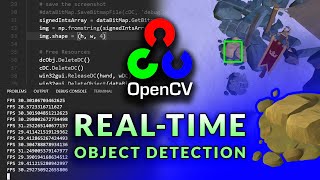
Real-time Object Detection
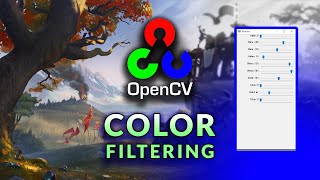
HSV Color Range Thresholding

Canny Edge Detection? ORB Feature Matching?
 My name is Ben and I help people learn how to code by gaming.
I believe in the power of project-based learning to foster a deep understanding and joy in the craft of
software development.
On this site I share programming tutorials, coding-game reviews, and project ideas for you to explore.
My name is Ben and I help people learn how to code by gaming.
I believe in the power of project-based learning to foster a deep understanding and joy in the craft of
software development.
On this site I share programming tutorials, coding-game reviews, and project ideas for you to explore.