by playing video games.
Java Projects
The Joy of Coding
In this beginner friendly Java project, we create a simple Bob Ross inspired painting using the Java Swing Graphics library. I go step-by-step through each line of code so that anyone can follow along. Understanding how to work with 2D graphics like this is a crucial step for learning video game development.
Links
Need help getting setup for Java development? https://www.youtube.com/watch?v=U3UV8c8TFG4
Grab this project code on GitHub: https://github.com/learncodebygaming/thejoyofcoding
Hi, welcome back. Certainly glad you could join me today.
I thought today we'd do a fantastic little Java project. Just a simple little painting exercise that I think you'll really, really enjoy doing. If this is your first time with us, let me extend a personal invitation for you to drag out VSCode, or your favorite Java editor, and code along with us. And if this is your first time coding in Java, I've got a handy little guide that will get you all set up in less than 10 minutes.
Tell you what, let's get right to it. Today we're going to be using the Java Swing library to make ourselves a little painting. I've already primed our project with an empty class and a simple main() method.
class App {
    public static void main(String[] args) {

    }
}
And the first thing we need to do is create a window for our canvas to live in. With the Java Swing library, we can do that using JFrame.
So here's your bravery test, right at the start. Ready? Time to write your first line of code.
We're going to create a variable that represents our window. The data type of this variable is going to be JFrame, and then you can name your variable whatever you like. I'm going to call mine "window", but you might call yours "frame", or something else, but keep it sensible. You don't want to use Pokemon characters for your variable names. You'll thank me later. Ok, now we need to assign some data to our variable. The equals sign is our assignment operator, and we're going to create a new object of type JFrame. And end it with a semicolon. Most statements in Java end with a semicolon.
class App {
    public static void main(String[] args) {
        JFrame window = new JFrame();
    }
}
Have I lost you already? Don't worry. Just let it happen.
Let's look at this line of code we've written, and shoot, VSCode is unhappy with us already. We know it is because we've got these little squiggly red lines under JFrame. Those little rascals. You learn to love ‘em. If you hover over one of them with your mouse you can see the error message. "JFrame cannot be resolved to a type". This is saying it doesn't know what we mean by JFrame. What we need to do is import the JFrame class.
So we could type in that import at the top of our file, above the App class definition, or we could use the "Quick Fix" feature in VSCode to do that a lot faster. Just click somewhere on the word JFrame, so your cursor is there, and then press ctrl+. to open up the Quick Fix options. Here it asks if we want to import JFrame from Swing, or create a new class called JFrame, or maybe we had a misspelling and we meant to write "JobName". In this case, we certainly want to import JFrame from Swing. There. The import has been added all nice and neat for us, and those little red lines are gone. Now we've got this yellow squiggly line, but that's ok, that's just a warning, not an error. It's just telling us "hey, you've got this variable here but you're not using it anywhere, so you might want to check that out." But of course, we'll be using it in a minute.
import javax.swing.JFrame;

class App {
    public static void main(String[] args) {
        JFrame window = new JFrame();
    }
}
Alright, let's speed things up a bit so we can get our window open and move on. Let's give the window a size. On the window object, we'll call the setSize() method, and we'll give it the width and height we want, in pixels. I'm going to set mine to 900 by 600, but you choose any window size you want. This is your world, you make it how you like it. And now to show the window, we need to call window.setVisibility(), and pass in "true".
import javax.swing.JFrame;

class App {
    public static void main(String[] args) {
        JFrame window = new JFrame();
        window.setSize(900, 600);
        window.setVisible(true);
    }
}
Ok let's run this to make sure everything's working.
Now then. When you close your window, you'll see in your console that your program is actually still running. That's no good. In the console, press ctrl+c to close the process. "Terminate batch job?" Yes.
Let's prevent that from happening. Back in our code, make a call to setDefaultCloseOperation(), still on our window object. And I'm going to do this first thing after initializing our object. And we need to tell it what that default close operation should be, so we'll pass in JFrame.EXIT_ON_CLOSE to exit our program when the window is closed. Now this bit of code, when you read it, it's a little confusing. So this is a great place to leave a comment to remind ourselves why this is here.
import javax.swing.JFrame;

class App {
    public static void main(String[] args) {
        JFrame window = new JFrame();
        // when we close the window, stop the app
        window.setDefaultCloseOperation(JFrame.EXIT_ON_CLOSE);
        window.setSize(900, 600);
        window.setVisible(true);
    }
}
Test your code often. Isn't that just gorgeous? The process ended when we closed our window. And you might be asking yourself right now "how did he know to write that bit of code?" Well. Someone told me (stackoverflow.com).
Now then. We need to add a canvas to our window. Something we can draw on. For that, we'll use another Swing component, called a JPanel. Now things are about to get a little bit hairy. But stay with me. You can do this. Anyone can do this. We need to add a JPanel to our JFrame, but... You know what? What the heck. Let's just do that.
We want to show our window as the last step, so I'll move that to the bottom. And in here, let's create a JPanel object, I'm going to call mine "canvas". And of course we need to import it, using our neat little trick. And we'll call window.add(), and pass in our canvas object. Ain't that easy?
import javax.swing.JFrame;
import javax.swing.JPanel;

class App {
    public static void main(String[] args) {
        JFrame window = new JFrame();
        // when we close the window, stop the app
        window.setDefaultCloseOperation(JFrame.EXIT_ON_CLOSE);
        window.setSize(900, 600);

        JPanel canvas = new JPanel();
        window.add(canvas);

        window.setVisible(true);
    }
}
Now I wish it were as simple as adding graphics to our canvas from here, but... This is Java after all, the land of Object Oriented Programming, and it doesn't take long before you need to understand a little bit about inheritance. JPanel has this method called paintComponent(), and we need to override that method to draw our graphics. It's a little rascal.
You know it's always a balance, when I make these tutorials, between keeping things as simple to understand as possible, so I don't scare you all away, but still teaching the proper techniques, the best and most powerful ways to do things.
Anywho, to do that override we could create an anonymous inner class. We won't, but let me show you what I mean by that. Because what the heck.
In Java, when you create a new instance of a class, you can overload methods on that new object without having to define a subclass, just by adding some curly braces between the constructor parentheses and the semicolon. Then in this space you can override anything you want. So I can define the paintComponent() method here, add the override annotation, call super on it, and all that sort of stuff.
import javax.swing.JFrame;
import javax.swing.JPanel;

class App {
    public static void main(String[] args) {
        JFrame window = new JFrame();
        // when we close the window, stop the app
        window.setDefaultCloseOperation(JFrame.EXIT_ON_CLOSE);
        window.setSize(900, 600);

        JPanel canvas = new JPanel() {
            @Override
            protected void paintComponent(Graphics g) {
                super.paintComponent(g);
                // TODO: more code here
            }
        };
        window.add(canvas);

        window.setVisible(true);
    }
}
But let's not do it that way here, because that's a little messy. Let's do it the more explicit way, where we create our own subclass of JPanel.
So you can define this in a new file if you want. When you have large projects, it's definitely good to put all of your classes in their own files. But for this exercise, to keep things simple, I'm just going to define our new class in the same file. Let's go down here, to the bottom, and we'll create a new class "MyCanvas" that extends from JPanel.
class MyCanvas extends JPanel {

}
And a question I get asked all the time from people is "why don't we put a semicolon after the curly braces here?" Well, when we're defining a class, or defining a method, those don't get semicolons. Also loops and if statements don't get semicolons. The anonymous class I showed you earlier did get a semicolon after the curly bracket, because while we were defining it we were also assigning it to a variable. There isn't any rule of thumb I can teach you so that you'll always know when a semicolon is needed. It's something you pick up over time, with practice.
And if you're not happy about it, well, maybe someday you'll write your own programming language, with your own grammar. Wouldn't that be wonderful?
Now we've got our class defined, and even though it's still empty, let's go ahead and update our main method to use it. So the type of "canvas" is now MyCanvas.
import javax.swing.JFrame;
import javax.swing.JPanel;

class App {
    public static void main(String[] args) {
        JFrame window = new JFrame();
        // when we close the window, stop the app
        window.setDefaultCloseOperation(JFrame.EXIT_ON_CLOSE);
        window.setSize(900, 600);

        MyCanvas canvas = new MyCanvas();  // notice how this line changed
        window.add(canvas);

        window.setVisible(true);
    }
}
Now I want you to run the code here, because we've got a subtle bug I want to talk about.
Here I've created a simple image in Paint, and sized it to 900 pixels by 600 pixels, the same as my window. And if we drag our window over it, you can see that it's actually smaller than the reference image we've created. That's because, when you call setSize() on a JFrame, that size includes the title bar, the window borders, and even the shadows around the edges. But we don't want that, what we want is our actual canvas size to be what we defined. So let me show you how to do that.
Let's get rid of setSize(). And while we're at it, we can give our window a title by passing a string in as the first parameter to the constructor. So you indicate it's a string by using quotes, and I'll call my window "Art". Now we need to set the size of our canvas. The method for that is setPreferredSize(). So we can either call that on our canvas object before we add it to the window... Or, I'll tell you what, let's define a constructor for our MyCanvas class, and call setPreferredSize() in there.
Now if you do this, every time you create a new MyCanvas object it'll use this same size, so it's up to you if this is how you want it to work or not. If we write 900, 600 in as the parameters for setPreferredSize(), you can see we've got an error. If we hover over it, I see "parameters" is in bold. And look at the method definition, it expects only one parameter, of type Dimension. So we need to pass in a Dimension object. You could create a new variable for this, but we can also do it inline, inside the parentheses, with "new Dimension()", and then that Dimension class does allow us to enter in the width and height as numbers. And we import Dimension from "java.awt".
Ok. Still with me?
Now back in main, after we've added everything to our window, but before we show it, we need to call window.pack(). This little method will wrap our frame around everything we've added to it. So since our custom JPanel is 900 by 600, that will stay that same size and the window frame will just be drawn around that component. It's not real obvious from our code that that's what's going on here, so let's add a comment to clear things up.
import java.awt.Dimension;
import javax.swing.JFrame;
import javax.swing.JPanel;

class App {
    public static void main(String[] args) {
        JFrame window = new JFrame("Art");
        // when we close the window, stop the app
        window.setDefaultCloseOperation(JFrame.EXIT_ON_CLOSE);

        MyCanvas canvas = new MyCanvas();
        //canvas.setPreferredSize(...);  // you could put this here instead
        window.add(canvas);

        // fit the window size around the components (just our canvas)
        window.pack();
        window.setVisible(true);
    }
}

class MyCanvas extends JPanel {

    public MyCanvas() {
        //setPreferredSize(900, 600);  // this is wrong
        setPreferredSize(new Dimension(900, 600));
    }

}
So let's run our code, and compare the window to our reference image, and you can see that it does appear our middle canvas area is the size we want.
Ok. You're doing great. Now might be a good time to stretch if you're feeling any tension in your body. Just relax. Let it go.
And as you come back to the code, let's just look at it for a minute. You know what I'm seeing? Not enough comments. Don't forget your comments. I've never had a teacher or a coworker tell me "you write too many comments." You can't have too many comments. Make them useful, of course. We don't need to know what your dog ate for breakfast (I'm guessing it was dog food). But there's almost always something helpful you can say in your comments.
Remember we spend more time reading code than we do writing it. And you read your own code more than anyone else's. So do yourself a kindness, make it readable.
import java.awt.Dimension;
import javax.swing.JFrame;
import javax.swing.JPanel;

class App {
    public static void main(String[] args) {
        // create a window frame and set the title in the toolbar
        JFrame window = new JFrame("Art");
        // when we close the window, stop the app
        window.setDefaultCloseOperation(JFrame.EXIT_ON_CLOSE);

        // create the canvas to draw on
        MyCanvas canvas = new MyCanvas();
        // add the canvas to the window
        window.add(canvas);

        // fit the window size around the components (just our canvas)
        window.pack();
        // don't allow the user to resize the window
        window.setResizable(false);
        // open window in the center of the screen
        window.setLocationRelativeTo(null);
        // display the window
        window.setVisible(true);
    }
}

class MyCanvas extends JPanel {

    public MyCanvas() {
        // set the canvas size
        setPreferredSize(new Dimension(900, 600));
    }

}
There.
While I was doing that, I also added a couple more lines, just to make our window a little nicer. setResizable(false) will prevent users from resizing our window, and setLocationRelativeTo(null) will start the window in the center of our screen, as I've noted in the comments.
Ok, now what. Shoot, I'll tell you what, I think it's time to paint.
Let's get started by covering our canvas in a thin even coat of liquid white. And by that I mean, let's set the background color to white. Back in our canvas constructor, we can call a method named setBackground(). This method belongs to our parent class, JPanel, or a class that JPanel extends from. Just like setPreferredSize(). And the argument we'll pass in for the first parameter is Color.white.
Now when I go to import Color using Quick Fix, it gives me lots of options, but none of them are the import we're looking for. So we'll need to do this import manually. If you ctrl+click on setBackground(), it will open that source code in another tab, and then if you hover your mouse over "Color" it will give us the details on that data type it's expecting. And here you can see that it's "java.awt.Color" that we need to import. So let's type that in. You can put this wherever, with the other imports. I like to keep mine alphabetized.
And when we run it, you can see that our canvas is now completely white.
By the way, we've got this yellow squiggly here under MyCanvas. You can Quick Fix that if you want. Shoot, I don't care. It's not important.
Now we're ready to override our paintComponent() method. Remember that little rascal? Shoot, I bet you thought I forgot all about it. I'm going to steal the method header for this by opening up the JPanel source, and then the JComponent source, and searching for "paintComponent". And I'll paste it in to our MyCanvas class. And in the body of that method I want to call super.paintComponent(), that way if there's anything important going on in the parent classes, that code will still execute.
And we need to import Graphics. Again, this isn't recognized by Quick Fix, but I know it's part of "java.awt" from the source code we just looked at. Shoot, you know what, let's save ourselves a little time. Go up to your imports, and instead of importing each of these things individually, let's import the entire java.awt library, and the entire javax.swing library. Because we're using a lot of components from them, and I'm confident those class names aren't going to conflict with anything else we've got going on. So you just add these stars, or asterisks, to import everything in a given package.
Now back down in paintComponent(), this step is optional, but I really like to mark my overloaded methods with the "Override" decorator. This just helps me see at a glance that this method replaces something in a parent class, so I know I can't change the method parameters or return type.
import java.awt.*;
import javax.swing.*;

class App {
    public static void main(String[] args) {
        // create a window frame and set the title in the toolbar
        JFrame window = new JFrame("Art");
        // when we close the window, stop the app
        window.setDefaultCloseOperation(JFrame.EXIT_ON_CLOSE);

        // create the canvas to draw on
        MyCanvas canvas = new MyCanvas();
        // add the canvas to the window
        window.add(canvas);

        // fit the window size around the components (just our canvas)
        window.pack();
        // don't allow the user to resize the window
        window.setResizable(false);
        // open window in the center of the screen
        window.setLocationRelativeTo(null);
        // display the window
        window.setVisible(true);
    }
}

class MyCanvas extends JPanel {

    private static final long serialVersionUID = 1L;

    public MyCanvas() {
        // set the canvas size
        setPreferredSize(new Dimension(900, 600));
        // set the canvas background color
        setBackground(Color.white);
    }

    @Override
    protected void paintComponent(Graphics g) {
        super.paintComponent(g);


    }

}
There's a lot going on isn't there? But don't worry, anyone can do this. All it takes is a little time, a little practice. Anything that you're willing to practice, you can do.
And you know what? I think we're finally ready to start painting.
Let's go into paintComponent(), and let's draw a sky. Wouldn't that be nice? So all I'm going to do is set my color. The Graphics class has a setColor() method, so I can call that on my "g" object. Let's start with blue.
And then we're going to draw a rectangle that's this blue color. So on the graphics object, I'll call fillRect(), for "fill rectangle", to get a rectangle that's filled with our color. And this takes 4 arguments. The first 2 are the X and the Y coordinates of the upper left hand corner of our rectangle. I want my sky to start in the very upper left corner of the canvas, which is 0, 0. In the Java Swing library, their coordinate system is to have the upper left corner as 0, 0, and the bottom right corner is the width and height that you gave your canvas. So in my case that's X = 900, Y = 600, is that bottom corner there.
So the next 2 arguments are the width and the height that I want for my sky. Well I want my sky to span across the entire canvas, so the width will be the same as my canvas width, which is 900. And for the height, well that can be whatever you want. I'll choose, I don't know, 220. Something like that. Don't worry too much about it. You can always change it later.
Let's see what that looks like.
Hey, pretty good. I think we've got something here.
But maybe, maybe that sky color isn't quite right. Maybe we want something a little lighter. Let me show you how to do that.
This color.blue, that's just a constant defined in the Color class. Let's use our ctrl+click trick to take a look at that. And here you can see, all this is, is a new Color object that has the red, green, and blue values set as integers. So we can use this to create our own colors, too. Isn't this just so neat?
So I'll copy that over, and put it in setColor(), and now I can change these RGB values to anything I want. So you could guess at what numbers add up to light blue, but heck, I don't know what that is, so let's look it up. You could use something like the Paint program to find the RGB value of a color, or what I like to do is go to Google, and search for "color picker", and here you have a wonderful little tool to help you find the color you want. And when you're happy, all you gotta do is copy that RGB value into your Color constructor. See how easy that is?
@Override
protected void paintComponent(Graphics g) {
    super.paintComponent(g);

    //g.setColor(Color.blue);
    // make a light blue sky
    g.setColor(new Color(157, 233, 245));
    g.fillRect(0, 0, 900, 220);
}
And now we've got this nice sky color.
I know, this project might seem a little frivolous to you, but if you're interested in making games, being comfortable with 2D graphics is so important. So important. And this project is a great little way to get comfortable.
You know what? Let's put a light source in this little painting. Still in paintComponent(), after we've drawn our sky, let's add a yellow sun. I'm going to set the color to yellow. And I'm using one of the constants here, but feel free to make your own color how I just showed you. This is your world, do whatever makes you happy.
And now I want to draw a circle. So we can guess, maybe, that g.fillCircle() is the method we want. But there's that squiggly red line again, that little rascal, so let's find out what methods are available, because it's telling us that fillCircle() is undefined.
I've already shown you how you can look in the source code to find out more about a class, so why don't I show you another way this time. Let's read some documentation. And I want you to stop and think for a moment about what you would search for in Google to find this documentation. What I would search for is "java graphics fillrect". Java, because that's the language we're using, Graphics because that the class we're working with, and "fillrect" because I already know this is a valid method on this class, and I suspect that any fillCircle() documentation will be very near to it. The first result we get looks very official https://docs.oracle.com/javase/7/docs/api/java/awt/Graphics.html so let's try that one.
And here you can see that this is the documentation page for java.awt.Graphics, and it lists out all of the methods available for this class. Let's search the page for the word "circle". And it brings us to drawOval(), which sounds like it could be what we want. If you read this summary, it does mention you can draw a circle with it, but it will only draw an outline. But just below it I see fillOval(), which is exactly what we're looking for.
So we're going to give it an X and Y, not of the middle of the circle, but of the upper left hand corner of the rectangle that bounds this circle. Be careful about making assumptions. You'll save yourself a lot of headache by actually reading the documentation. Trust me. And then we give it the width and height of the rectangle. So let's plug that in.
@Override
protected void paintComponent(Graphics g) {
    super.paintComponent(g);

    // make a light blue sky
    g.setColor(new Color(157, 233, 245));
    g.fillRect(0, 0, 900, 220);
    // with a yellow sun
    g.setColor(Color.yellow);
    g.fillOval(680, 30, 60, 60);
}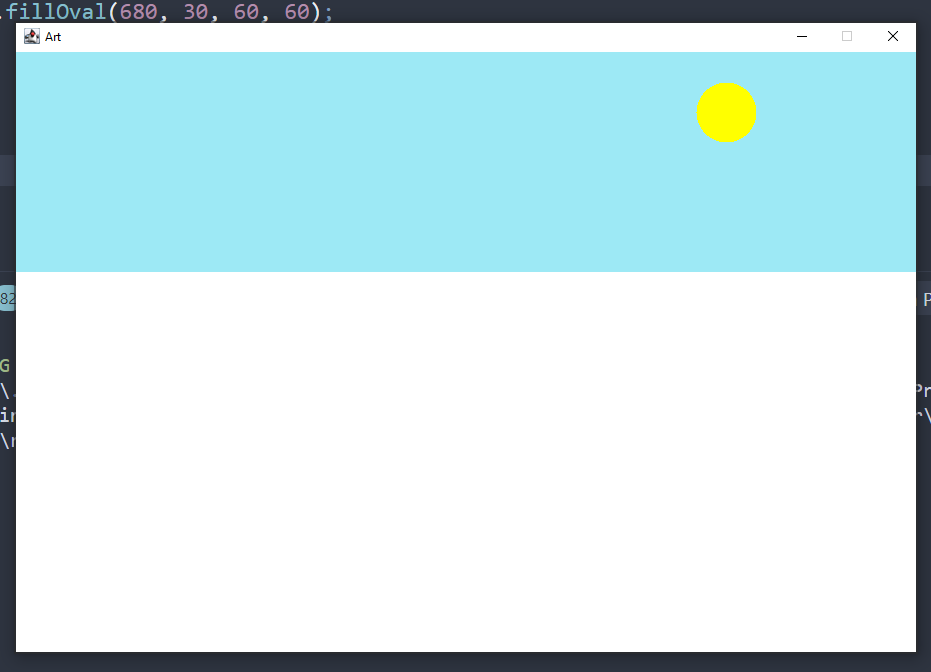
And look at that. Really brings you back to kindergarten, doesn't it?
Now this is important. The way these graphics are rendered is, anytime we add a new graphic, it draws that on top of the graphics we already have. So we have to work from the back forward as we build our scene, just like a real painting. To see what I mean, let's move the sun code above the sky code, so the sun will be drawn first, and the sky will be drawn second. Code is executed line by line, top to bottom. Now you don't see the sun, because it's behind this blue rectangle.
Oo, sometimes I get carried away. I see something here.
Now you can continue like this, and keep adding more and more graphics in paintComponent(), but I think we can all see where this is going. We're gonna have a complete mess inside this method by the time we're done. So let's do something about that.
Now this is where it gets fun. We have so many options, so many possibilities for organizing our code. This is your chance to fire up your imagination, and really decide, what makes sense to you? What feels right for this project? You know what I'd love? I'd love to show you how to create and use your own class. Wouldn't that be wonderful?
Maybe, right up in here, lives… lives, yep, maybe there's an object here that we use to do our painting.
I'll call it a Paintbrush. I think that's one word. Maybe it's two, heck I don't know. And I'll call this Paintbrush object "myBrush". And I'll initialize it, and pass over the Graphics object. There.
@Override
protected void paintComponent(Graphics g) {
    super.paintComponent(g);

    // create an object to draw with
    Paintbrush myBrush = new Paintbrush(g);
}
Now we need to define this class I just made up. Again, you can do this in a separate file, that's not a bad idea, but to keep things simple I'll just add it below here. Make sure you're not inside of any other curly braces. And lets create a constructor that will accept our Graphics object, and hang on to that inside a private member variable. So this way, any other methods we write inside of Paintbrush will have access to this Graphics object.
Now let's move our code that draws the sky into a new method on our Paintbrush class. I'll call it drawSky(). But again, you can name your methods whatever you like.
class Paintbrush {

    private Graphics g;

    public Paintbrush(Graphics graphics) {
        // when creating a new Paintbrush object, you must pass in the graphics context.
        g = graphics;
    }

    public void drawSky() {
        // make a light blue sky
        g.setColor(new Color(157, 233, 245));
        g.fillRect(0, 0, 900, 220);
        // with a yellow sun
        g.setColor(Color.yellow);
        g.fillOval(680, 30, 60, 60);
    }

}
And now we can do something magical. In paintComponent(), after we've created the brush object, we can now call drawSky() on it to execute all of the code inside that method.
@Override
protected void paintComponent(Graphics g) {
    super.paintComponent(g);

    // create an object to draw with
    Paintbrush myBrush = new Paintbrush(g);
    // draw the different graphics that make up our painting
    myBrush.drawSky();
}
And when you run this, the output should look just the same as before. But now we're more organized.
Tell you what, let's do. Let's build us a little mountain. I think we need some mountains in our painting. And now we have so much creative power, look at that, it can just happen for you, we can just go and call myBrush.drawMountains().
@Override
protected void paintComponent(Graphics g) {
    super.paintComponent(g);

    // create an object to draw with
    Paintbrush myBrush = new Paintbrush(g);
    // draw the different graphics that make up our painting
    myBrush.drawSky();
    myBrush.drawMountains();
}
Just make it up. Whatever you wanna have in your paintbrush, you decide. You decide.
That's probably what initially got me interested in programming. Is that I could create any kind of world that I wanted. Any kind of world I wanted. No bad stuff here. All straight lines and precise. Logical. A computer will do only what you tell it to, and that can be anything you want. Anything you want.
We just need to define what drawMountains() means.
So we'll make it public, which means that it can be used outside of the walls of this class. Which is what we want, because we want to call it from paintComponent(). And we'll set the return type to void, because we aren't returning any data from this method. And then we write the name, and we aren't asking for any parameters inside of the parentheses.
Now mountains are jagged, so we need a way to draw something jagged. And in the documentation, I noticed there's this method called fillPolygon(). I think that'll work. That'll work.
public void drawMountains() {
    // draw a mountain
    g.setColor(Color.brown);
    Polygon triangle = new Polygon();
    triangle.addPoint(15, 450);  // bottom-left
    triangle.addPoint(390, 60);  // top
    triangle.addPoint(550, 450);  // bottom-right
    g.fillPolygon(triangle);
}
As always we start by setting our color. There isn't a Color.brown, so we'll have to make our own. And, you know, there are certain colors that I like to use a lot when I'm painting, so why don't we go ahead and define those as constants in our class. Ok, I've set up all my colors as class variables in the Paintbrush class. PHTHALO_BLUE, CAD YELLOW, ALIZARIN_CRIMSON.
I've declared them final, because their values won't be changing, and I've declared them private because I don't want to use these values anywhere outside of this class. I've declared them as static as well, because their values won't be any different between different instances of this Paintbrush class. You could leave off all three of these modifiers, and your code would work just as well, but it's good to get in the habit of using them so that you can start to understand what they mean. I've also put these names in all caps, because this is a common convention we use for variables that store a constant value. This makes it easier to read our code later, and I know you get tired of hearing it, but pay attention to that readability. So important.
Now in drawMountains() I can set the color to VAN_DYKE_BROWN.
For our first mountain, let's just draw a simple triangle. To do that, we'll create a new Polygon, that I'll call "triangle", and then we add three points, one for each vertex. Then we can use this Polygon object to pass into fillPolygon(). And just that easy, we have our first mountain.
class Paintbrush {

    private static final Color ALIZARIN_CRIMSON = new Color(78, 21, 0);
    private static final Color BRIGHT_RED = new Color(219, 0, 0);
    private static final Color CADMIUM_YELLOW = new Color(255, 236, 0);
    private static final Color DARK_SIENNA = new Color(95, 46, 31);
    private static final Color INDIAN_YELLOW = new Color(255, 184, 0);
    private static final Color MIDNIGHT_BLACK = new Color(0, 0, 0);
    private static final Color PHTHALO_BLUE = new Color(12, 0, 64);
    private static final Color PHTHALO_GREEN = new Color(16, 46, 60);
    private static final Color PRUSSIAN_BLUE = new Color(2, 30, 68);
    private static final Color SAP_GREEN = new Color(10, 52, 16);
    private static final Color TITANIUM_WHITE = new Color(255, 255, 255);
    private static final Color VAN_DYKE_BROWN = new Color(34, 27, 21);
    private static final Color YELLOW_OCHRE = new Color(199, 155, 0);

    private Graphics g;

    public Paintbrush12(Graphics graphics) {
        // when creating a new Paintbrush object, you must pass in the graphics context.
        g = graphics;
    }

    public void drawSky() {
        // make a light blue sky
        g.setColor(new Color(157, 233, 245));
        g.fillRect(0, 0, 900, 220);
        // with a yellow sun
        g.setColor(Color.yellow);
        g.fillOval(680, 30, 60, 60);
    }

    public void drawMountains() {
        // draw a mountain
        g.setColor(VAN_DYKE_BROWN);
        Polygon triangle = new Polygon();
        triangle.addPoint(15, 450);  // bottom-left
        triangle.addPoint(390, 60);  // top
        triangle.addPoint(550, 450);  // bottom-right
        g.fillPolygon(triangle);
    }

}
Shoot, this is so much fun, let's get crazy. Let's give him a friend. Maybe... maybe with multiple pointy tops on it. I'll have five vertices total in my polygon, but remember, don't add another point just because I did. Put one in your painting because you want it there. I just want to show you how to make a mountain. You decide how it looks in your world.
And you might be wondering, "Ben, how am I supposed to figure out what all these coordinates should be? Do I just picture a giant grid in my mind, and count over so many columns and so many rows?" Well, I think that is a good thing to practice visualizing. I'm of the opinion that it's always good to do things the tedious way first. That way when you do learn the shortcut, you're that much more excited about it. But let me show you a little trick that I've been using.
If you open up Paint, or any other image editing program, and set your same canvas size. And draw out a simple shape that you want. Now when I hover over each of those vertices, I can see in the lower left corner what those coordinates are. Pretty neat, huh?
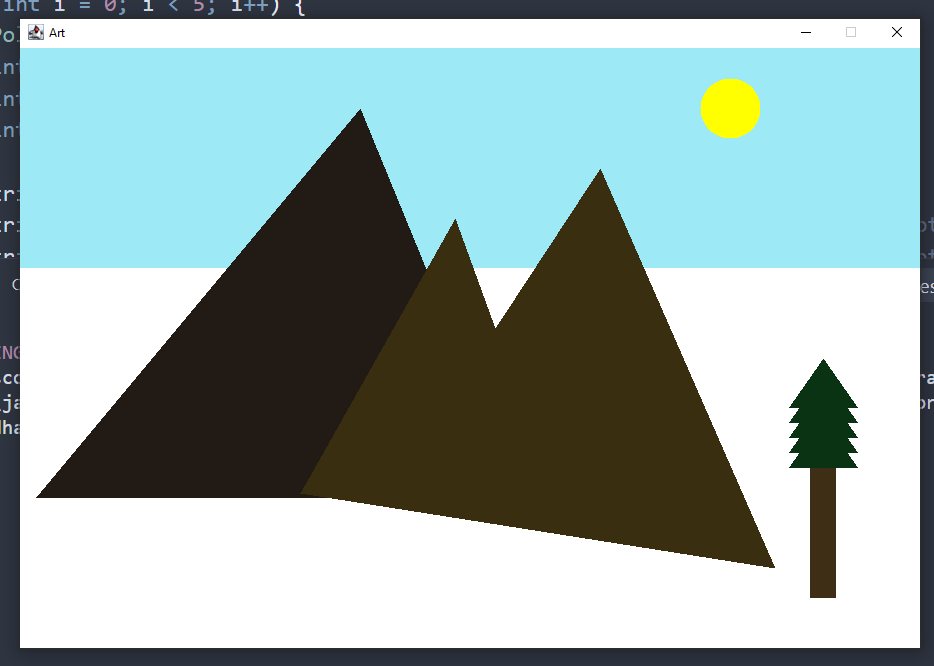
Now if we don't pick a new color, our two mountains are going to bleed into each other, and we lose that sense of separation. So I can pick a different color like DARK_SIENNA, but that doesn't look great, either. What if we could mix colors, just like a painter does on a palette?
Shoot, this is getting long, huh? Heck, I'm having so much fun, let's keep going.
Figuring out how to blend two colors would be a challenging project in itself. And heck, maybe someday, you should go back and do that sometime. That'll give you a lot of practice. A lot of practice. But to move this project along, I'm gonna search for a solution on StackOverflow.
And sure enough, that didn't take long did it? I found this nice blend() method that takes two colors and a blending ratio, and it returns a new color. And it doesn't look like it's going to install a virus on my computer, so what the heck, let's try it out. There are no mistakes when copying from StackOverflow, only happy little accidents (*sarcasm).
To use this, I'll create a new Color variable called "mountainMix", and I'll blend VAN_DYKE_BROWN with some YELLOW_OCHRE, at a ratio of 15% YELLOW_OCHRE. We need to put the "f" after 0.15 to indicate that this value is of type "float" instead of a "double". This blend() method is requesting a "float".
public void drawMountains() {
    // draw a background mountain
    g.setColor(VAN_DYKE_BROWN);
    Polygon triangle = new Polygon();
    triangle.addPoint(15, 450);  // bottom-left
    triangle.addPoint(340, 60);  // top
    triangle.addPoint(500, 450);  // bottom-right
    g.fillPolygon(triangle);

    // draw a foreground mountain
    Color mountainMix = blend(VAN_DYKE_BROWN, YELLOW_OCHRE, 0.15f);
    g.setColor(mountainMix);
    Polygon jagged = new Polygon();
    jagged.addPoint(280, 445);
    jagged.addPoint(435, 170);
    jagged.addPoint(475, 280);
    jagged.addPoint(580, 120);
    jagged.addPoint(755, 520);
    g.fillPolygon(jagged);
}

// https://stackoverflow.com/a/20332789/4655368
private Color blend(Color c1, Color c2, float ratio) {
    if ( ratio > 1f ) ratio = 1f;
    else if ( ratio < 0f ) ratio = 0f;
    float iRatio = 1.0f - ratio;

    int i1 = c1.getRGB();
    int i2 = c2.getRGB();

    int a1 = (i1 >> 24 & 0xff);
    int r1 = ((i1 & 0xff0000) >> 16);
    int g1 = ((i1 & 0xff00) >> 8);
    int b1 = (i1 & 0xff);

    int a2 = (i2 >> 24 & 0xff);
    int r2 = ((i2 & 0xff0000) >> 16);
    int g2 = ((i2 & 0xff00) >> 8);
    int b2 = (i2 & 0xff);

    int a = (int)((a1 * iRatio) + (a2 * ratio));
    int r = (int)((r1 * iRatio) + (r2 * ratio));
    int g = (int)((g1 * iRatio) + (g2 * ratio));
    int b = (int)((b1 * iRatio) + (b2 * ratio));

    return new Color( a << 24 | r << 16 | g << 8 | b );
}
And now we've got this lovely color for our foreground mountain.
We can't have a happy little painting without a tree, can we? So let's add a tree. Here you might choose to pause and try to draw a tree yourself. I'm going to be using a loop, so see if you can't use a loop somehow, too. And when you're ready, we'll be here.
Ok, let's call myBrush.drawTree(), and then create the drawTree() method.
I want to start with the trunk, because that's going to be hidden behind the leaves. And here, what the heck, let's mix together three colors. So I've got VAN_DYKE_BROWN, DARK_SIENNA, and some CADMIUM_YELLOW in this trunk. And never be afraid to run your program, and see what you got.
public void drawTree() {
    // draw the trunk
    Color trunkMix = blend(VAN_DYKE_BROWN, DARK_SIENNA, 0.21f);
    trunkMix = blend(trunkMix, CADMIUM_YELLOW, 0.08f);
    g.setColor(trunkMix);
    g.fillRect(790, 410, 26, 140);
}
Wonderful. Now let's draw some leaves. We'll start by mixing some SAP_GREEN with PHTHALO_GREEN, and setting that as our color. And the technique I'm going to use here is, I want to draw several triangles in a line from top to bottom, where each triangle, as it gets lower on the tree, gets a little wider. Of course I could draw those by defining each shape individually, but let's be a little clever about it and use a for-loop.
Here I've created a classic for-loop, where the iterator variable "i" will start at 0, and it will increment by 1 each time through the loop. And it will continue until "i" is no longer less than 5, at which point it will exit the loop. And each time through this loop, we'll be constructing a new Polygon, and we'll be drawing it on our canvas. So I've added those parts of our code first.
public void drawTree() {
    // draw the trunk
    Color trunkMix = blend(VAN_DYKE_BROWN, DARK_SIENNA, 0.21f);
    trunkMix = blend(trunkMix, CADMIUM_YELLOW, 0.08f);
    g.setColor(trunkMix);
    g.fillRect(790, 410, 26, 140);

    // draw the leaves
    Color leafMix = blend(SAP_GREEN, PHTHALO_GREEN, 0.11f);
    g.setColor(leafMix);
    // draw five levels of leaves
    for (int i = 0; i < 5; i++) {
        Polygon triangle = new Polygon();

        // add the triangle
        g.fillPolygon(triangle);
    }

}
Now let's think about the top of our tree, that first triangle. And let's just code in the top point with a fixed value. For me I found that 803, 310 is about where I want that to be.
Now let's do the bottom left vertex. We know the vertical coordinate, the Y coordinate, is going to be 310 plus whatever we want the height of our triangle to be. So if we wanted our triangle to be 50 pixels tall, this Y value would be 360. But instead of hardcoding this as 360, let's call it 310 + height. And then we'll create a variable called "height", of type integer because this is a whole number value, and give it that value of 50.
We can even start thinking about the next vertex, because we know the bottom right will have the same Y value of 310 + height.
Now we just need to figure out the X value of these bottom vertices. Well, if we want our top triangle to be 70 pixels wide, let's create another variable for that, and we want our top vertex to be in the exact middle of the triangle, we intuitively know that the right corner needs to be 35 pixels over to the right from the mid-line, and the left corver will be 35 pixels over to the left. 35 is half of 70, which will put the top vertex in the center. So you could take 803 minus 35, which is 768, and put that in as the X value for the bottom left corner. But it would be better to write 803 - 35 in the code. And then 803 + 35 for the right corner. But where does this 35 come from? It's half of 70, our width, so why not write 803 - (width / 2).
Now you've got a more dynamic algorithm, and I'll show you the benefits of this in a minute.
public void drawTree() {
    // draw the trunk
    Color trunkMix = blend(VAN_DYKE_BROWN, DARK_SIENNA, 0.21f);
    trunkMix = blend(trunkMix, CADMIUM_YELLOW, 0.08f);
    g.setColor(trunkMix);
    g.fillRect(790, 410, 26, 140);

    // draw the leaves
    Color leafMix = blend(SAP_GREEN, PHTHALO_GREEN, 0.11f);
    g.setColor(leafMix);
    // draw five levels of leaves
    for (int i = 0; i < 5; i++) {
        Polygon triangle = new Polygon();
        int height = 50;
        int width = 70;

        triangle.addPoint(803, 310);  // top
        triangle.addPoint(803 - (width / 2), 310 + height);  // bottom-left
        triangle.addPoint(803 + (width / 2), 310 + height);  // bottom-right

        // add the triangle
        g.fillPolygon(triangle);
    }
}
Now I'm about to run the program here, but before I do I want you to think about what's going to happen. Think about how many times we're going through this loop, and what's going to happen each time.
So we see one triangle here, but there are actually 5, each stacked on top of each other. Because each time through the loop, we drew another triangle using the same coordinates. So each time through this loop, we need to move the next triangle down a little bit.
Let's make another variable for how much vertical spacing there should be between each triangle. And moving things down is a Y coordinate shift, so we're only going to be changing the Y, and each time through the loop we need to add more spacing. So you might be tempted to just add "spacing" to each Y value, but if you think about what this does, it's just going to add the same 15 pixels to every vertex, shifting all the leaves down equally. Instead, we need to incorporate this "i" value so that the amount changes each time through the loop.
If we add (spacing * i), think about what that does. The first time through the loop, when "i" is 0, 15 * 0 is 0, so no spacing is added. The next time, "i" is 1, 15 * 1 is 15, so 15 pixels are added to the position. The next time, "i" is 2, 15 * 2 is 30, so 30 pixels are added. And so on.
public void drawTree() {
    // draw the trunk
    Color trunkMix = blend(VAN_DYKE_BROWN, DARK_SIENNA, 0.21f);
    trunkMix = blend(trunkMix, CADMIUM_YELLOW, 0.08f);
    g.setColor(trunkMix);
    g.fillRect(790, 410, 26, 140);

    // draw the leaves
    Color leafMix = blend(SAP_GREEN, PHTHALO_GREEN, 0.11f);
    g.setColor(leafMix);
    // draw five levels of leaves
    for (int i = 0; i < 5; i++) {
        Polygon triangle = new Polygon();
        int height = 50;
        int width = 70;
        int spacing = 15;

        triangle.addPoint(803, 310 + (spacing * i));  // top
        triangle.addPoint(803 - (width / 2), 310 + height + (spacing * i));  // bottom-left
        triangle.addPoint(803 + (width / 2), 310 + height + (spacing * i));  // bottom-right

        // add the triangle
        g.fillPolygon(triangle);
    }

}
Now when we run this, we've got that nice stacked effect we're looking for. And it's even starting to look like a tree.
See? Math isn't so scary. Or maybe it is. Let's see if you can figure out this next one.
Remember I said I wanted each triangle to grow a little bigger as we worked our way down. How do you think we'd do that? Well the position of the top points won't change, but the corners will need to be expanded down and out by some growth factor. Let's create a variable to control that growth factor. And we'll make it a float, because it's a decimal value. Or you could make it a double, so you don't need this ugly "f" at the end. Doesn't matter to me.
So here I'm saying, I want each level of branches to grow by 26% each time through the loop. But it won't just do that, we need to tell it to, by writing the appropriate code. And we know the top point isn't changing. And let's give ourselves some room here to do more math. What happens if we multiply the coordinates of the bottom two points by "growth"? Well if you work out the math with some examples, you'll see that it just shrinks those values, so a position like 768, 360 becomes 199.68, 93.6, which is completely out of whack.
What we want to do is multiply the coordinates of the first triangle by 1, so that they don't change. Then the next coordinates by 1.26, so they get slightly larger. Then in the third loop by 1.52, because we added another 26% growth, and so on. And this formula here will do that. You can work it out on paper if you don't believe me. I don't mind.
So let's run this and see what we got.
Now this is my favorite part. When an error pops up like this, the first thing you're gonna wanna do is: take all of your doubts and feelings of inadequacy, and just beat the devil out of it.
Now look again at the error message and find the line number… you can even click on it and it'll bring you right to the problem. And here the message is saying we're passing in float values, but this method expects integers. And this makes sense, because the pixels on your screen are indivisible, whole units. You can't have a single pixel display multiple color values at once.
So we need a way to convert our float values into integers. And there's a common function for that, Math.round(). So we can just wrap our whole calculations in this method call, and it's so common we don't even need to import anything.
public void drawTree() {
    // draw the trunk
    Color trunkMix = blend(VAN_DYKE_BROWN, DARK_SIENNA, 0.21f);
    trunkMix = blend(trunkMix, CADMIUM_YELLOW, 0.08f);
    g.setColor(trunkMix);
    g.fillRect(790, 410, 26, 140);

    // draw the leaves
    Color leafMix = blend(SAP_GREEN, PHTHALO_GREEN, 0.11f);
    g.setColor(leafMix);
    // draw five levels of leaves
    for (int i = 0; i < 5; i++) {
        Polygon triangle = new Polygon();
        int height = 50;
        int width = 70;
        int spacing = 15;
        // set a factor for how wide the branches should grow each time as we work down
        float rate = 0.26f;
        float growth = 1 + (rate * i);

        triangle.addPoint(803, 310 + (spacing * i));  // top
        triangle.addPoint(
            Math.round(803 - (width / 2) * growth),
            Math.round(310 + height + (spacing * i) * growth)
        );  // bottom-left
        triangle.addPoint(
            Math.round(803 + (width / 2) * growth),
            Math.round(310 + height + (spacing * i) * growth)
        );  // bottom-right

        // add the triangle
        g.fillPolygon(triangle);
    }

}
And with that fixed, we've got ourselves a happy little tree. Now I'm going to move on, but if your tree needs a few friends you should absolutely go right ahead and do that.
Maybe... maybe even you could make another loop around your calls to drawTree(), and draw a whole grove of them. That'd be really something, wouldn't it? Think about what sort of parameters you'd need to add to your drawTree() function to do that.
Ok, I know the old clock on the wall is telling me it's getting late, but there are still two more things I wanna show you.
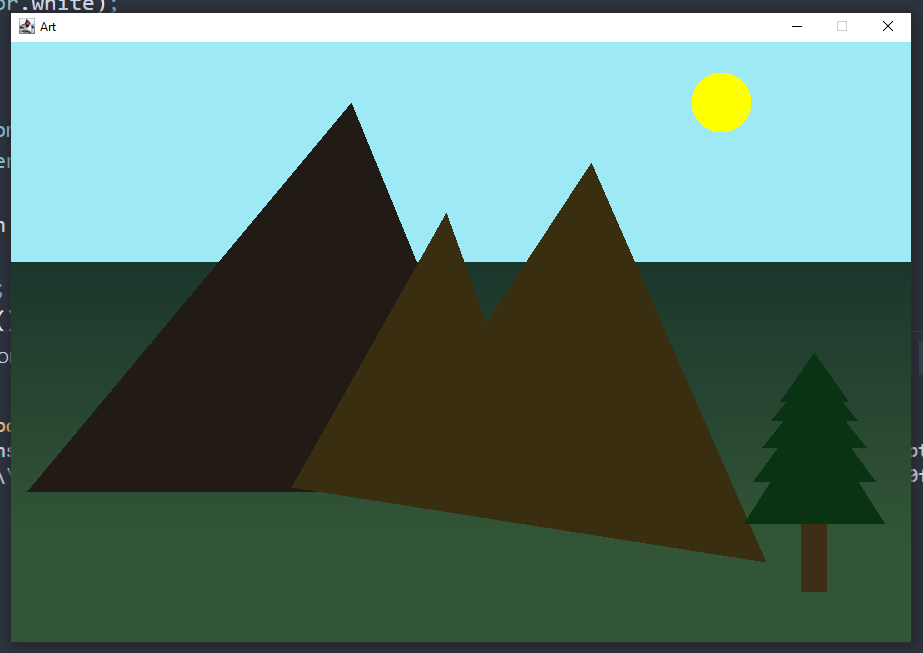
I think our painting needs a little grass, don't you? And to do this, I want to use a gradient to create the illusion of distance. You'll see what I mean.
Way back up in paintComponent(), let's add a call to drawGrass(). And in Paintbrush we'll define this method. And then we'll mix up some color. And we need two colors this time, one for the start of the gradient, and one for the end. Maybe use some TITANIUM_WHITE this time.
Now we need to make a gradient out of this. And for that, we can use the GradientPaint class. This is just another tool in java.awt. And in the first two parameters you set a keypoint for your first color. I'll use 0, 0. And then you give it your first color. This will be the color at the top of our grass, so it'll be the one that appears most distant. Then you set the keypoint for the second color. I'll use 0 again for the X, because I don't want the color to change from left to right, but I'll put in 500 for the Y, so that the first color fades into the second color over a space of 500 pixels, in the vertical direction. And finally, we give it that second color.
Now then. We've got a gradient all ready to use. But if we try to pass our gradient in to setColor(), we get an error don't we? This method only takes a Color type value, not a GradientPaint.
To use this gradient, we need to move on from the world of the Graphics class, and into Graphics2D. Fortunately, it's pretty easy to create a Graphics2D object from our Graphics object, just by casting it. The Graphics object given to paintComponent() in JPanel is secretly also a Graphics2D object, which extends Graphics, and we can tease that out just by putting (Graphics2D) in front of it. You might think this casting thing doesn't come up very often, but in Java, believe it or not, you really does. So it's good to get comfortable with it.
Now that we have this Graphics2D object, we can call setPaint() and give it the gradient. Then call fillRect() on it to draw our rectangle, just like we did for the sky.
public void drawGrass() {
    // create a gradient from top to bottom
    Color grassFarMix = blend(SAP_GREEN, PHTHALO_BLUE, 0.414f);
    Color grassNearMix = blend(SAP_GREEN, TITANIUM_WHITE, 0.165f);
    GradientPaint grassMix = new GradientPaint(0, 0, grassFarMix, 0, 500, grassNearMix);

    //g.setColor(grassMix);
    // we need to cast the Graphics to Graphics2D to use the gradient
    Graphics2D g2 = (Graphics2D) g;
    g2.setPaint(grassMix);
    g2.fillRect(0, 220, 900, 600);
}
And when we run it... Shoot, that little rascal. The gradient looks good, but we've covered over our mountains. Let me show you how easy that is to fix.
Remember we need to draw our graphics from back to front, because each new one is placed on top of the ones already there. And remember the main controller for all of this is up in paintComponent(). Now because we got ourselves organized, we can just move drawGrass() to happen before drawMountains().
@Override
protected void paintComponent(Graphics g) {
    super.paintComponent(g);

    // create an object to draw with
    Paintbrush myBrush = new Paintbrush(g);
    // draw the different graphics that make up our painting
    myBrush.drawSky();
    myBrush.drawGrass();
    myBrush.drawMountains();
    myBrush.drawTree();
    //myBrush.drawGrass();  // adding grass here overlaps our mountains
}
There. Shoot, we just about have a finished painting here.
Now I want to do just one more thing. One final touch up before I let you go. I really do hope you've enjoyed coding with me today. I know I have.
This last step I'm going to call finishingTouches(), and that'll be the last method on our Paintbrush class, and the last thing we call in paintComponent(). Let's define it, and in here I wanna show you how to draw an image file on your canvas.
So first you'll need an image file, and once you've found one you like, put that in your project folder. Now in finishingTouches() we want to read that image file into a variable. This data type will be BufferedImage, which you import from java.awt.image.BufferedImage, and for the variable name we can just call it "image". And to populate this value we'll call ImageIO.read(), import as javax.imageio.ImageIO, and then this method wants a File object. So we create a new File object, and in the constructor we pass in the path to our image file as a string. Because this image file is in our project folder, we can just give it the filename, with the extension.
Now you might be seeing this error "Unhandled exception type IOException". Whenever we're reading from the file system, there's a chance that something could go wrong. And if that happens, it will generate an exception, with this IOException type. To deal with exceptions in Java, we use a try/catch block.
So you put the code you want to execute in the try block. And then we'll catch any IOException that gets thrown when that code in the try block runs. And if that does happen, this code here will run, which we have printing out a message to our console with the exception details.
But if the image does load successfully, we can use that to pass into g.drawImage(), which will draw the image on our canvas. And I'll use 0, 0 as the anchor point to match the upper left of the image with the upper left corner of our canvas. And we don't need any ImageObserver, so we'll indicate this by setting it to null. And if you want to know more about what null means, I'm gonna tell you to consult another video, because this was our last line of code today and I'm just so excited to see what we ended up with.
public void finishingTouches() {
    try {
        // you can use just the filename if the image file is in your
        // project folder, otherwise you need to provide the file path.
        BufferedImage image =
            ImageIO.read(new File("mountain_sunset.jpg"));
        g.drawImage(image, 0, 0, null);
    } catch (IOException exc) {
        System.out.println("Error opening image file: "+exc.getMessage());
    }
}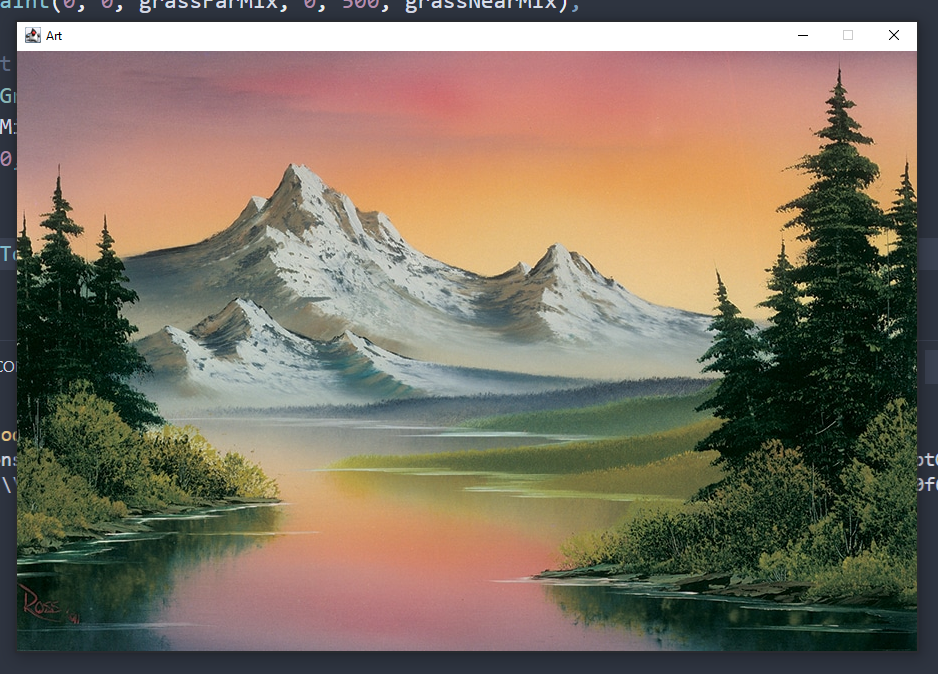
Look at that. Isn't that just gorgeous?
I really hope you tried this one, because as I said at the beginning, this a very simple Java project, that you can do even if you've never coded before. And remember to make it your own. Don't be afraid to try new things, and see just how far you can take it.
I'd love to see what you come up with, so if you don't mind sharing with us, I invite you to post your paintings on Twitter with the hashtag #joyofcoding.
So I hope you really enjoyed it, and I look forward to seeing you again next time. And from all of us here, happy coding, and god bless.

How to make a Video Game in Java (2D Basics)

AP Computer Science A - Study Session
 My name is Ben and I help people learn how to code by gaming.
I believe in the power of project-based learning to foster a deep understanding and joy in the craft of
software development.
On this site I share programming tutorials, coding-game reviews, and project ideas for you to explore.
My name is Ben and I help people learn how to code by gaming.
I believe in the power of project-based learning to foster a deep understanding and joy in the craft of
software development.
On this site I share programming tutorials, coding-game reviews, and project ideas for you to explore.